Sunday, October 25, 2009

My 2003 Suzuki SV650 Progress as of 25 October 2009

102509p-2003 Suzuki SV650 (10)

Modifications
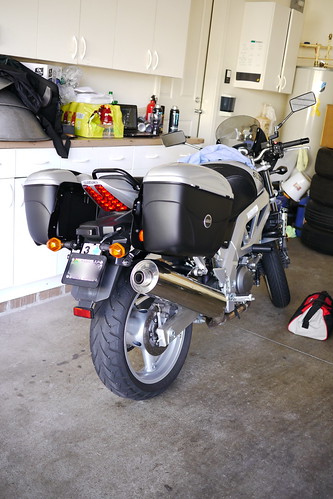
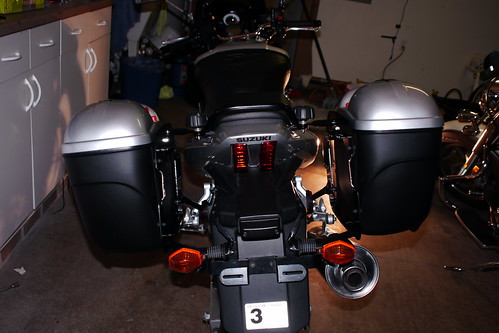
  • SW-MOTECH Lockable Quick Disconnect Side Carrier with GIVI Monolock adapter
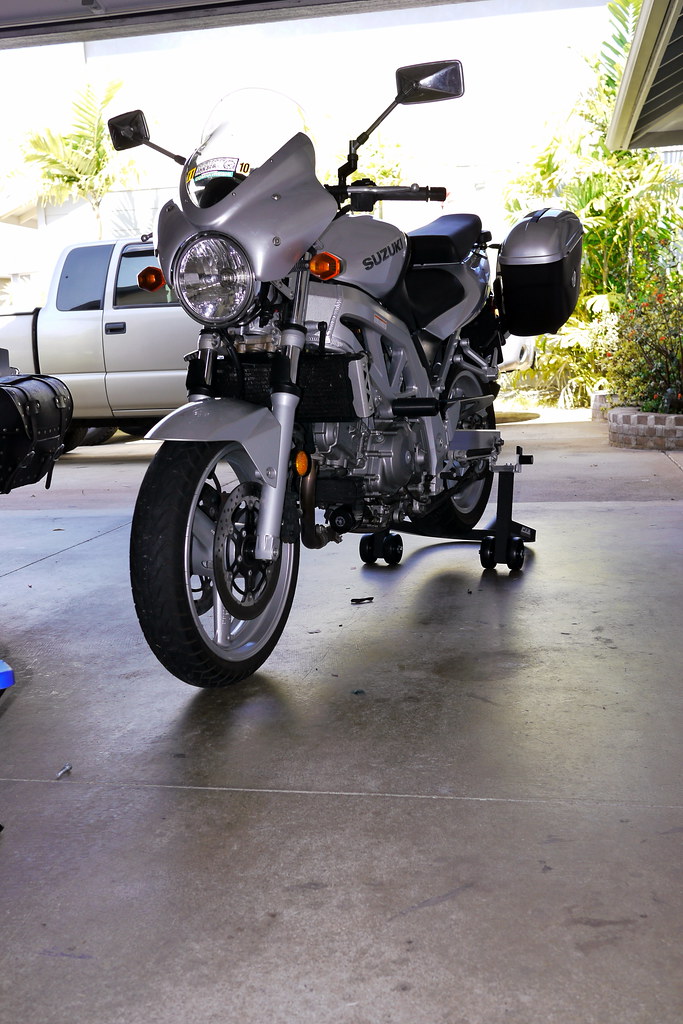
  • GIVI E21 Side Luggage with Gloss Silver lid
  • GIVI Windscreen Universal A770 (previous owner)
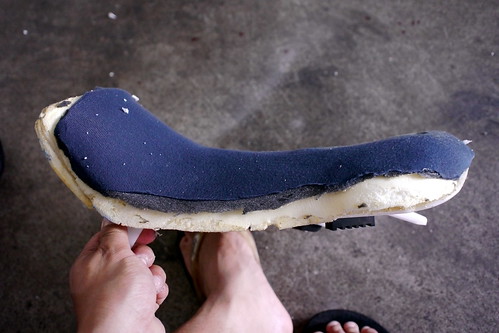
  • Shaved Suzuki Gel Seat (previous owner except for the shaving)
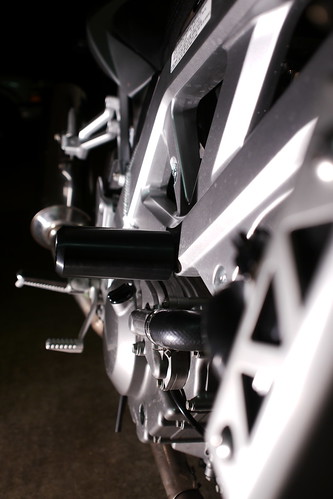
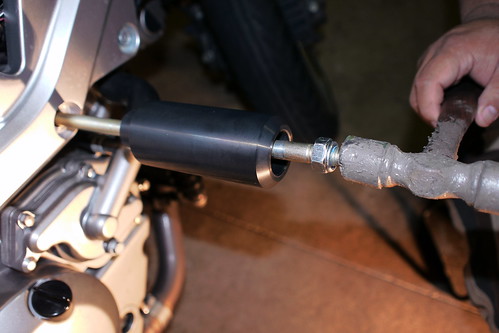
  • MotoSliders Frame Sliders
  • Kisan Technologies PathBlazer Headlight Modulator
  • Kisan Technologies TailBlazer Brake Modulator
  • Convert front stock turn signals to daytime running lamps
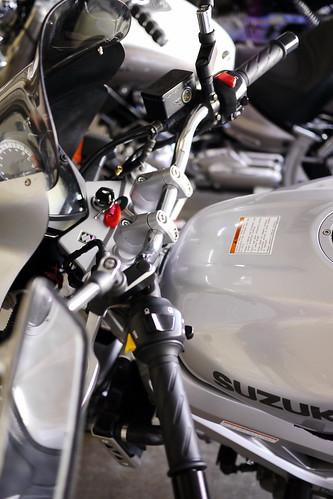
  • SW-MOTECH handlebar barback and riser
  • SW-MOTECH mirror extenders
  • Suzuki Tank Bra (previous owner)
  • Safety Check plate
  • Vortex Swingarm Spools
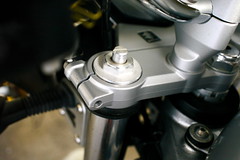
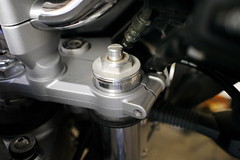
  • Lowered front via fork triple clamps

102509p-2003 Suzuki SV650 (18) 102509p-2003 Suzuki SV650 (15)

Immediate Plans
  • Install the 1.25" rear lowering links (dogbones)
  • Rise the fork risers 1/2"
  • Shorten side stand (~1")
  • Transfer the Kisan Technologies VectraLight from the Virago to the Suzuki

Possible future plans
  • More rear running lights
  • Replace stock exhaust
  • SW-MOTECH Alu-rear Top Rack [to transfer my JC Whitney large trunk when I need to do some grocery shopping]

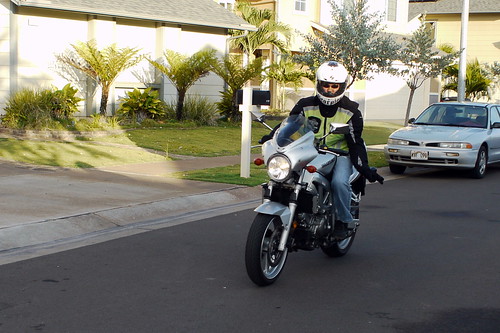
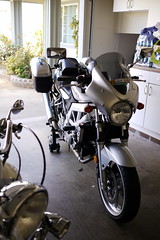
flickr Photo Set of current mods on my 2003 Suzuki SV650

SW-MOTECH Handlebar Pullback and Riser

102509p-Handlebar Pullback n Riser (56)
I installed the SW-MOTECH pullback and riser on a Sunday morning. I performed little modifications to ensure enough slack for the electrical & mechanical cables and brake lines. See pictures for self-explanation of the little things I did:

102509p-Handlebar Pullback n Riser (25) 102509p-Handlebar Pullback n Riser (28)


102509p-Handlebar Pullback n Riser (45) 102509p-Handlebar Pullback n Riser (51)

I haven't ridden the bike yet, but I'll update of the feel. I definitely am seating more upright, which should relieve some pressure on my wrist.

flickr Photo Set on the SW-MOTECH Handlebar Barback and Riser

Friday, October 23, 2009

Starting Problem Troubleshooting

I been having problems starting my motorcycle. I purchased a battery tender and that helped a bit. Afterward, I started to commute everyday for approximately 12 miles roundtrip and on my fourth day, the bike could not start. The afternoon of that day, I tried charging the battery, and testing and disassembling the starter motor and relay to no avail. Since I purchased a "just in case" replacement battery from WalMart, I charged it and replaced the existing battery, and baamm! starts with no effort. Apparently, due to my short commute, the charging system does not have enough time to charge the battery. Hence, the battery tender is now installed nightly.

Monday, October 19, 2009

Workaround for Helmet Lock with Saddle Luggage

101709p-D-Ring Extension and Helmet Lock (6)
Due to the location of the Givi E21 Side Saddle bags, I could not efficiently lock my helmet to the hooks underneath the passenger seat. A workaround was to use a helmet lock extension and a clip-on keychain to allow me to lock my helmet without much effort.

NOTE: I have considered relocating the helmet lock but I did not want to hold another key (3 total for motorcycle, U-lock and SW-MOTECH quick disconnect lock).

flickr Photo Set of Helmet Lock with SW-MOTECH Side Carrier and Givi E21 Hard Luggage

SW-MOTECH Quick Disconnect Side Carrier and Givi E21 Saddle Luggages

101809-Givi-SWMOTECH Side Carrier (8)
Initially, I was planning to purchase hard luggage next year after my Europe trip and using a PacSafe LidSafe to store my gear as a stop gap. However, it took awhile to remove and store my gear in the LidSafe and I wanted to re-start hitting the gym prior to or after work. Hence, the luggage was purchased less than a week of owning this motorcycle.

One of my criteria for upgrading from the 250 Virago to a 500CC+ Standard motorcycle was side saddle and/or trunk luggage availability without much customizing. The FZ6 and SV650 was my top choices. And thanks to the great resources of Twisted Throttle, whom provides great service via their internet website and quick shipping, I installed the SW-MOTECH quick disconnect side carrier bracket and Givi E21 luggage during a work night.

Not much to say regarding the relatively straight forward installation other than:
  1. I used heat shrink (material not provided) for splicing and lengthening the cable for the turn signal.
  2. The license plate bracket was flipped upside down.
101509p-SWtech-Givi Saddle  Bags Installation (75)

flickr Photo Set of SW-MOTECH Side Carrier and Givi E21 Installation

Friday, October 16, 2009

SW-MOTECH Mirror Extenders

101409p-Mirror Extenders (41)
Me coming from a cruiser, I'm used to seeing my rear without much head movement. However, since upgrading to a standard, I would need to look over my shoulder to see the rear. Thanks to the various products by SW-MOTECH, I installed their mirror extenders and now, I'm back to my old habits with the cruiser, no more looking over my shoulder. This motorcycle is turning into a touring machine, eventhough I have no intention of riding this motorcycle in another state -- loving it.

flickr SW-MOTECH mirror extenders photo set

Thursday, October 15, 2009

motoSliders' Frame Sliders

101409p-MotoSliders (9)

As recommended by various users on SVrider forum, I purchased motoSlider's Frame Sliders for Suzuki SV650 motorcycles. The installation was straight forward and very easy once the tools are acquired -- the deep socket 19mm which is not common in my tool box. My initial concern was holding up the engine when removing the stock bolt -- which was not a concern.

101409p-MotoSliders (3)

We simply unbolted the stock engine mount bolt on the right side of the motorcycle and concurrently removed the stock engine mount bolt while installing the frame sliders. Less than 20 minutes of work; albiet, more pre-planning to stage the tools.

flickr Photo Set of MotoSlider's Frame Sliders installation

Kisan Technologies pathBlazer and tailBlazer


Since I ride practically everyday, which is easy thanks to Hawaii's year round riding weather, safety is my main concern. I'm more of a function over form guy--see my Virago. One of the safety equipment suggested were a headlight modulator (legal by federal law) and a brakelight modulator. I purchased both modulators from Kisan Technologies immediately based on my positive usage of their products (pathBlazer and vectraLight on the Virago). The pathBlazer, aka headlight modulator, was very easy to install and took no more than 15 minutes. The tailBlazer, aka brakelight modulator, took some effort to splice into the brake wire, extending the wire and routing to an optimal location of the tailBlazer underneath the passenger seat.

See the above video of the result and my flickr photo sets for the installation photos: Brakelight Modulator | Headlight Modulator

Monday, October 12, 2009

Raising the Forks via the Triple's

I dropped the front 12/32" by raising the forks via triples. Very easy modification to perform and I felt I earned better handling--or what seems to be a similar response to my Virago. I needed help from my brother to ensure the motorcycle did not tip over.

Using the side stand and bricks between the rear tire, we jacked the front end via a floor jack underneath the engine (?) to provide a support structure prior to loosening the front fork upper and lower clamps (12mm?). We loosen the upper clamp bolts (2 bolts), followed by the lower clamp bolts (4 bolts). Then, we slowly lowered the floor jack to raise the fork ~ 12/32". After verifying both left and right side tubes were even, the upper and lower clamp bolts were re-tightened and torqued to 16.5 lb-ft or 198 lb-in.

101209p-12 32 Lowering Front via Triples (6) 101209p-12 32 Lowering Front via Triples (17)
flickr lowering the front via triples set

I may later raise the forks to a total of 3/4" after the installation of the longer dogbones (1.25" lowering links).

Shaving the Seat

I dropped my motorcycle infront of my friends and cousins after a horrible lost during the University of Hawaii Warriors versus Fresno State University Bulldogs football game at Aloha Stadium; albiet, the tailgating was hella fun! The problem was my low speed skills on a much taller bike combined with a small grade and my inexperience with the location of the pegs on a standard motorcycle (directly below, hence, It got in the way). Due to this embarrasing situation (no major damage), I decided I need to lower the motorcycle alittle due to me searching for a proper footing with my lack of skills of manuevering a much taller and heavier motorcycle than my very forgiving 2003 Yamaha Virago.

101209p-2003 Suzuki SV650 Gelseat Shaving (5)
flickr shaving gelseat photo set

I shaved the seats by removing the foam from the base vice from the top portion of the foam. This allowed me to retain the relatively smooth shape of the seat. I simply followed various instructions from various websites. Overall, I felt I'm 1.5" closer to the ground. Tools required was the 12mm(?) and 10mm(?) allen wrench to remove the seat and covers, respectively, a power staple gun with T50 1/4" staples and adhesive (3M general adhesive).

Very easy modification and quite forgiving. By the way, I'm a vertically challenged individual and I wanted more confident, eventhough I been riding almost daily for 3 years with very small beginner's cruiser.

In the Mail: Aftermarket parts that seems to be necessary (updated 2)

Here's a list of parts that I immediately ordered with less than a week of procuring my motorcycle:
  • motoSliders Frame Sliders [installed]
  • Kisan Technologies Headlight Modulator (P115W-S) and Brake Modulator (100HD) [installed]
  • Spare Suzuki blank key (from eBay user "bartolete") [received]
  • Service manaul (electronic copy) and owners manual (not provided by previous owner)
  • 1.25" rear lowering kit ["dogbones" or "links"] SV650 for 2003-08 (from eBay user "supermoto36") [received]

    Bulk purchase from Twisted Throttles
  • Handlebar riser barbacks & top clamps [installed]
  • SW-MOTECH mirror wideners for right-threaded M10 mirrors [installed]
  • Givi E21 Monokey Sidecases/Saddlebags (pair) - 21 liters/case [installed]
  • SW-MOTECH Quick-Lock Sidecarrier [installed]
  • SW-MOTECH Keyed Locking Quick-Lock Fasteners (pair) [installed]
  • SW-MOTECH sidecase adapter kit for Quick-Lock sideracks (GIVI Monokey/Kappa) [installed]
  • First Modification-Daytime Running Lamps on the Front Turn Signals

    I was surprised to find the front turn signal lamps are not daytime running lamps (DRL) (ie, only one filment element in the light bulb). Hence, I purchased a tail light converter from Checkers in Waipahu and went through the trials and tribulations of installing a feature that should have been designed and incorporated from the factory.

    Anyway, the tail light converter I purchased is normally used for trailers; note using a relay could have easily achieved the conversion of the front turn signal lamps to DRL. Input is left, right, ground, brake and tail light. The output is left, right, ground and tail light. The output tail light confused the hell of me and the packaging did not include the electrical schematics.

    Otherwise, after a few trial and errors, including replacing the 30A fuse due to a short circuit during meter checks and running wires to locate the tail light converter unit underneat the driver's seat, conversion for DRL was executed fabulous and my brother tells me the lights are really noticable.

    The final installation schematic
    For the input:
  • Left input signal spliced in series to the left signal at the headlight housing
  • Right input signal spliced in series to the left signal at the headlight housing
  • Ground is spliced to rear tail light ground
  • Tail light and brake is spliced to rear running lamp signal

    For the output:
  • Left output signal spliced in series to the left signal at the headlight housing
  • Right output signal spliced in series to the left signal at the headlight housing
  • Ground is connected directly to the battery negative terminal
  • Tail light output signal is not connected

    The key was connecting the tail light converter input brake and tail light signal. However, the turn signals now flash faster than stock.

    flickr daytime running lights on the front turn signals conversion

  • New-to-Me 2003 Suzuki SV650 Motorcycle

    P1110205

    flickr Photo Collection of my new-to-me motorcycle

    My second motorcycle, a 2003 Suzuki SV650 (Naked) motorcycle purchased 05 October 2009. Quite a contrast from my first motorcycle, a 2003 Yamaha Virago. Otherwise, the motorcycle is in great condition with only 4300 miles and ridden by an older military guy from Mililani Mauka who's main ride is a cruiser--hence, the lack of miles.

    Modifications included with the bike were a OEM Suzuki Gel-seat, and a color-matched Givi fairing/windscreen. Services by Pflueger Honda / Yamaha Motorcycles
    in Waipahu, where I regularily took my Virago for tire replacements and safety check.

    I had to pay the late fee registration fee, but the safety check is up to date and due in March 2010. I easily transfered my base decal from the cruiser to the standard thanks to me being a civilian and the motorcycle not being a sports bike.

    Otherwise, I'm glad I waited to find and purchase this bike since SV650's are rare on the island and when they are available at or near blue book on Craigslist, they are sold within 24 hours.